Print placemats: professional guide and DIY decoration
Louis MikolajczakShare
Printing a placemat: the perfect combination of professional tool and DIY decor
Long considered a simple placemat, the placemat has become a clever medium: discreet and effective communication for professionals , and a customizable decorative accessory for the home . If you are hesitating between a quick home print and a lasting professional print, this article guides you step by step. We will see where printing a placemat has the most impact (restaurant, hotel, event), how to make it a real decorative “plus” in DIY, which material to choose according to the use (paper, laminate, textile, PVC), and layout tips that avoid unpleasant surprises when printing. The ultimate goal: to give you concrete advice, applicable today, to obtain reliable, beautiful placemats that will match perfectly with your table runners .
Why the pros print their placemats
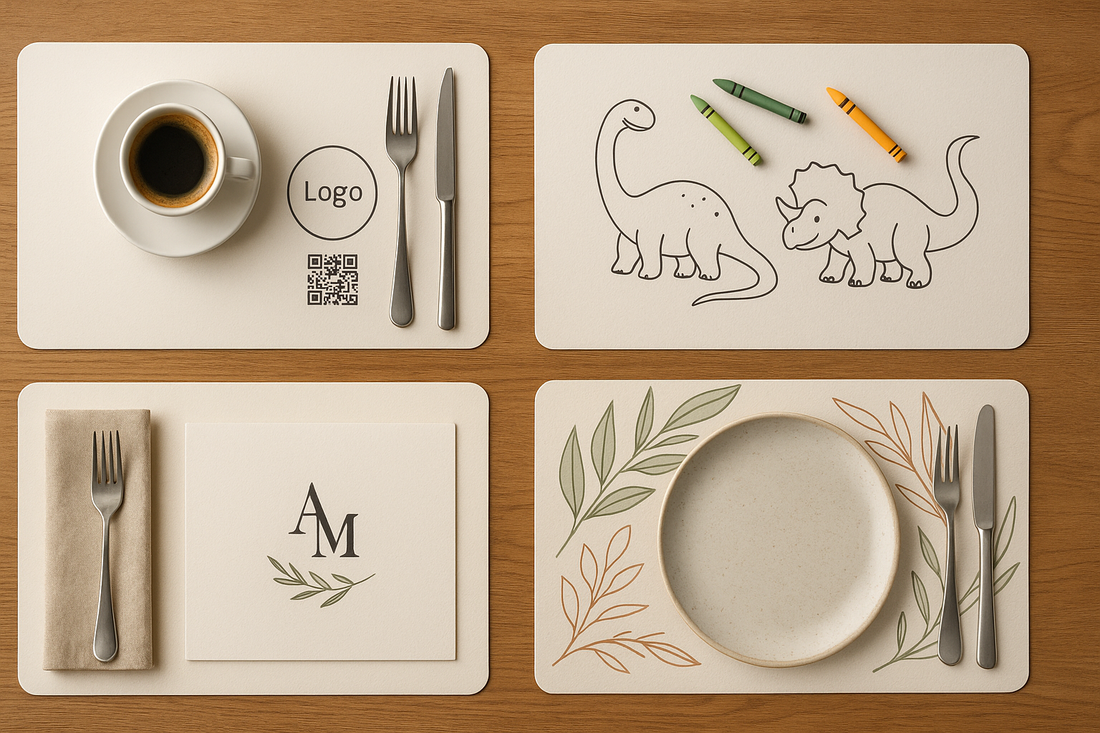
In the catering and events industry, placemats do much more than protect the table. They're a branding tool , a silent medium that accompanies the entire experience. Printing a placemat then becomes a no-brainer: logo visibility, useful information, QR code to the online menu, seasonal messages... all at a controlled cost.
Neighborhood restaurant
- House logo and colors to anchor the identity.
- QR code “Menu of the day”: easy update without reprinting the menus.
- Short storytelling: origin of products, local commitment.
Hotel & Breakfast
- Reminder of timetables, major allergens, sorting circuits.
- Hot drinks menu with clear pictograms.
- Tip: Wipe-clean surface for quick cleaning between services.
Catering & Events
- Visual theme of the day (wedding, gala, seminar) for table consistency.
- Minimal table plan or legend of dishes for buffets.
- Event hashtag to encourage photos.
Cafe & Bakery
- Breakfast/lunch options at a glance.
- “Off-peak” promotions printed on a discreet banner.
- Recycled paper set: perceived as authentic and eco-friendly.
DIY Ideas for Home & Parties
At home, a decorative placemat can change the ambiance without having to redo the entire table. You can print a personalized placemat for a dinner party with friends, a children's birthday party, a Sunday brunch, etc. The advantage of DIY: a design that's 100% yours, reprintable as often as you like, and flexible themes (seasons, colors, patterns).
- Children's birthday: coloring set (wax crayons on thick paper), first name and age, small puzzles around the theme (pirates, space, dinos).
- Cozy brunch: minimalist patterns (linear, plant-based), soft palette (beige, sage, terracotta), integrated place markers.
- Festive table: wedding, baptism, Christmas: include menu, thank you, and a little “take-away souvenir”.
Budget tip: Print in A3 for a generous print (420 x 297 mm). If your home printer only prints in A4, join two halves (with discreet markers) or laminate an A4 for a clean, long-lasting effect.
Printing materials & techniques
Choosing the right material is 80% of the result. Here's a clear overview of the most common materials and processes for restaurant and decorative placemats :
| Support | Recommendations | To avoid | Ideal use |
|---|---|---|---|
| 120–170 g paper |
A4/A3 digital printing Matte white, unvarnished Textured recycled paper
|
Weight < 100 g (too thin) Very glossy varnish (reflections)
|
Pop-up events, seasonal menus |
| Laminated paper 80–125 µ |
Matte lamination (anti-reflective) Rounded corners
|
Sharp edges (peeling) Loose inks
|
Daily use at home, canteen, cafe |
| Soft PVC / PP |
UV printing Surface wipe-clean
|
Thickness too thin (<0.5 mm) Edges not chamfered
|
Restaurants, hotels (durable, washable) |
| Coated textile / polyester |
Sublimation (stable colors) Machine washable
|
Pure cotton without coating (stains)
|
Premium decor, high-end branding |
| Laminated cork (variant) |
Light UV printing Visible natural grain
|
Ink overloads (bleeding)
|
Rustic/chic atmosphere, wine bars |
Process-wise: digital (low quantities, short lead times), offset (larger runs), UV (plastics/rigids), sublimation (textiles). For a homemade laminated placemat , aim for 300 dpi, 8–10 mm internal safety margins, and 3 mm bleed.
Designs & inspirations
Design should clarify and enhance. Here are some ideas that work for both professional and personal use, without falling into the "rough draft":
Minimal elegant
- Sans-serif typeface, hierarchical sizes.
- One dominant color + one accent (60/30/10 rule).
- Fine lines to structure menus, QR codes, logos.
Nature & terroir
- Filigree botanical motifs (opacity 5–8%).
- Sage, clay, cream palette.
- Perfect for cafes, brunches, family tables.
Educational & fun
- Coloring areas, spot the difference games, word searches.
- Boxes for first name + date of event.
- Ideal for the children's placemat option.
Thematic event
- Wedding: monogram, date, menu in 3 acts.
- Christmas: subtle star patterns, brick red + pine green.
- Seminar: brand codes, values, QR to agenda.
Practical tips & mistakes to avoid
Whether you choose a personalized placemat for a restaurant or a DIY placemat to print , here are the points that make all the difference.
- Format: A3 is comfortable for professionals; A4 is OK for DIY if laminated. Avoid formats that are too narrow (the cutlery will overflow).
- Cleaning: choose wipe-clean matte surfaces (fewer fingerprints, no glare).
- Rounded corners: reduce delamination of plastic films and make them more pleasant to the touch.
- Colors: if you go through a printer, work in CMYK; at home, stick to simple solid colors (inkjets saturate quickly).
- Typography: titles 18–24 pt, texts 11–12 pt, strong contrasts (black #111 on light background).
- Professional content: QR code tested (scanning distance 30–40 cm), allergen information, contact details, opening hours.
- DIY for kids: breathable white areas for coloring, and thick outlines (1.5–2 pt).
Practical cases & FAQs
Case 1 — Market cuisine bistro
- Support: 170 g paper, prints per season (offset if volumes).
- Design: cream background, stylized vegetables in filigree.
- Contents: lunch menu, QR code to wine cellar, producer information.
Case 2 — Urban coffee shop
- Backing: 0.8mm matte soft PVC (washable, durable).
- Design: minimal black & sand, picos drinks.
- Content: loyalty program via QR + Insta.
Case 3 — Country Wedding
- Support: textured paper + thin matte lamination.
- Design: monogram, olive branch, 3-course menu.
- Plus: souvenir to take away, mini-game on the back.
Case 4 — Children’s birthday party
- Support: 160 g paper, in-house printing.
- Design: areas to color, first name, candles to count.
- Tip: Laminate to reuse with erasable markers.
FAQ
1) What is the difference between home and professional printing?
Home: practical and economical for small quantities, especially in A4/A3 paper (ideal for paper placemats or coloring placemats ). Pro: cleaner finish, washable supports (PVC, textile), better color retention and finishes.
2) How can I make my sets last on a daily basis?
Matte lamination 80–125 µ (rounded corners), or soft PVC/PP UV-printed. Avoid very hot water and abrasive sponges. A wipe with a microfiber cloth and mild soap is sufficient.
3) Can I include a full menu on the set?
Yes, but prioritize: starters/main courses/desserts in 3 columns maximum, legible sizes, and offer a QR code for details (allergens, options). The set must remain “breathable”.
Need a truly premium look? A personalized placemat made of coated fabric or sublimated polyester is easy to clean and stays true to your brand's colors.
Conclusion
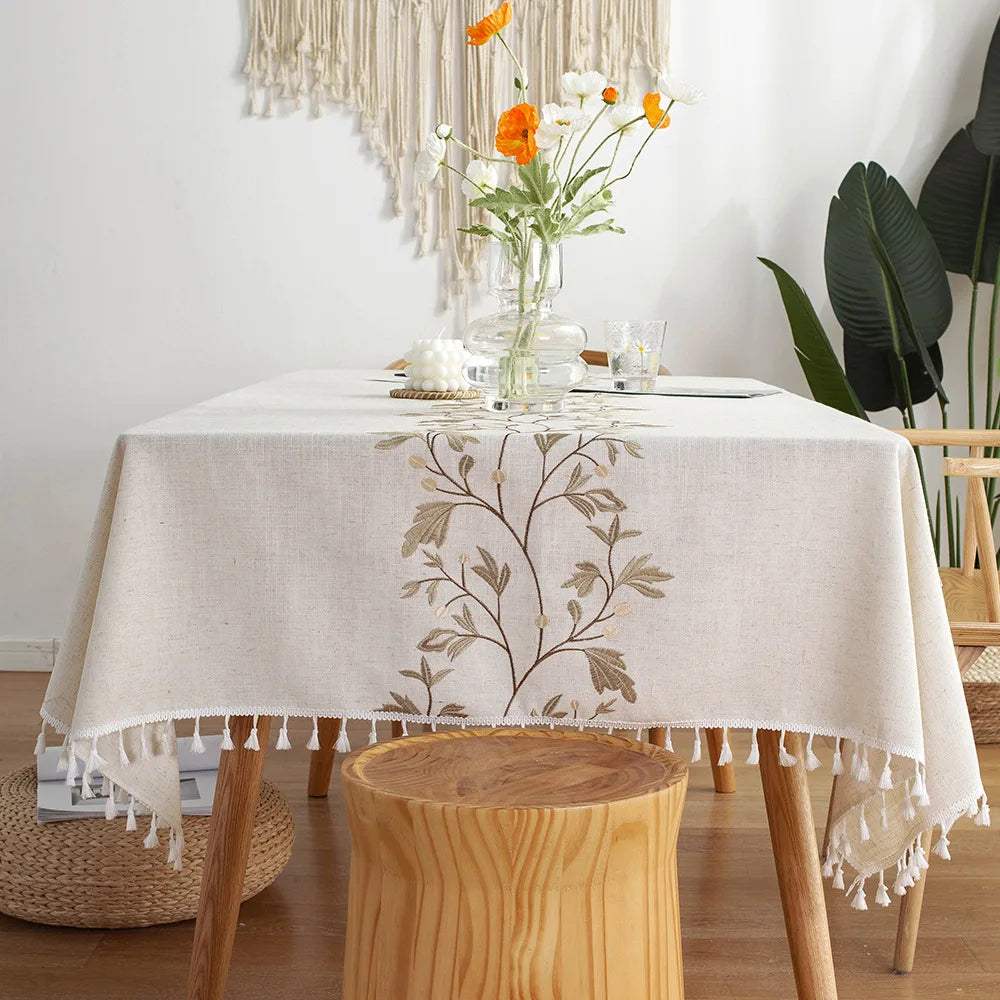
A good placemat is a balance: useful (information, QR, protection), beautiful (consistent palette, legible typography), and suitable for use (paper for ephemeral, laminated for home, PVC/textile for intensive). Whether you are a pro or a DIY decor enthusiast, you now have the keys to printing a placemat without wasting time or money, and obtaining a clean, durable result that truly matches your style. To complete your table and harmonize the whole, also take a look at the suitable tablecloths: Tablecloth .